


Want to find out how KUNBA packaging machines can benefit you? Contact and consult our team of experts to find out about packaging solutions tailored to your needs!
You’ve just finished a sealing session—maybe fresh meat portions, marinated vegetables, or prepared meals for the week. The chamber is streaked with juice residue, tiny crumbs cling to the sealing bar, and the gasket looks slightly damp. You close the lid and walk away, planning to “get to it later.”
That “later” is where most chamber vacuum sealer problems begin.
Unlike external vacuum sealers where food never enters the machine, chamber vacuum sealers place the entire bag—and whatever is inside it—directly into the chamber. Liquids, marinades, protein juices, and food particles inevitably end up inside the chamber during operation. Left uncleaned, these residues become breeding grounds for bacteria, accelerate wear on gaskets and seals, and can eventually damage the vacuum pump.
This guide answers the single most common maintenance question: how often should you clean your chamber vacuum sealer? More importantly, it gives you a practical schedule you can implement immediately—whether you use your machine daily in a commercial kitchen or weekly at home.
(https://youtu.be/unc5rFKd7Tc?si=lq_vi-8FSPAPXbvf)
Why Cleaning Frequency Matters More Than You Think
Before diving into the schedule, it’s worth understanding what happens inside a chamber vacuum sealer during normal operation.
The machine works by removing air from the chamber, which simultaneously evacuates air from the open bag inside. Because the bag is open during the vacuum cycle, any liquid or moisture inside the bag can be pulled out into the chamber. This is actually one of the key advantages of chamber sealers—they can handle liquids without sucking them into the pump. But it also means the chamber interior regularly comes into direct contact with food products.
Over time, residual food particles, grease, and liquids can foul gaskets, corrode sealing elements, and cause vacuum leakage. The most common consequences of inadequate cleaning include:
-
Weak or incomplete seals caused by debris on the sealing bar
-
Loss of vacuum pressure from contaminated or worn gaskets
-
Pump strain and failure from oil contamination
-
Cross-contamination between different food types
-
Unplanned downtime when a worn part fails mid-session
A 2023 food safety guideline from the FDA Food Code emphasizes that food-contact surfaces of equipment must be cleaned “as often as necessary to keep them clean”—a principle that applies directly to vacuum packaging equipment. For food processing environments, cleaning frequency should also match product risk: meat, seafood, ready-to-eat foods, and high-moisture products require stricter cleaning protocols than dry goods.
Note: Industry standards like the FDA Food Code provide general food safety frameworks. For specific cleaning requirements, always refer to your equipment manufacturer’s manual.
The bottom line: a consistent cleaning routine is not optional—it’s the single most effective way to protect both food safety and equipment longevity.
The Complete Cleaning Schedule
The cleaning frequency for a chamber vacuum sealer depends primarily on usage volume and product type. A machine used daily for sealing raw meat needs far more attention than one used weekly for dry goods.
Here is a tiered maintenance schedule based on industry best practices:
| Frequency | Task | Why It Matters |
|---|---|---|
| After every use | Wipe chamber interior, sealing bar, and gasket; drain and dry chamber; remove visible debris | Prevents bacterial growth, cross-contamination, and residue buildup that hardens over time |
| Weekly | Inspect gaskets for cracks or compression; clean pump intake filter; check oil level | Maintains vacuum level and pump efficiency; catches wear before failure |
| Monthly | Test vacuum depth and seal strength; perform deeper inspection of all wear points | Identifies gradual performance decline before it becomes critical |
| Quarterly | Replace anti-stick Teflon tape; perform leak test; inspect valve seats | Restores consistent seal quality; prevents product loss |
| Annually | Full preventive maintenance: pump service, gasket replacement, electrical inspection | Extends equipment life and ensures safety compliance |
For lighter users, a deep cleaning monthly and thorough component inspection quarterly may be sufficient. For heavy commercial users running the machine daily, implement daily sanitation protocols and check oil levels weekly.
Step-by-Step: How to Clean Your Chamber Vacuum Sealer
Cleaning a chamber vacuum sealer correctly is as important as cleaning it frequently. Here is a practical step-by-step guide:
Power down and cool the machine
Always unplug the machine before cleaning to prevent electrical shock. Allow the sealing bar to cool completely—the heating element can remain hot enough to cause burns or damage cleaning cloths.
Remove loose debris
Use a soft brush or non-abrasive cloth to remove food particles, crumbs, and visible residue from the chamber, lid, and sealing bar.
Wipe surfaces with appropriate cleaner
Use a food-safe detergent solution (pH neutral) with warm water. Apply with a damp cloth—never a wet one—to avoid water seeping into electrical components. For stubborn residue on the sealing bar, isopropyl alcohol on a soft cloth can remove oils without damaging the surface.

Clean the gasket
Gaskets are the single most common cause of degraded vacuum performance. Wipe them with warm water and mild detergent. Avoid solvents that can swell or harden the elastomer material. Some chamber models allow gaskets to be removed for more thorough cleaning.
Drain and dry the chamber
If your model has a chamber drain, check and clear any blockages. Dry all surfaces with a lint-free cloth to prevent rust and residue formation.
Check the drip tray
For models with removable drip trays, empty and wash with warm soapy water, rinse, and dry thoroughly before reinstalling.
What to avoid:
-
Harsh chemicals that can damage food-contact surfaces or leave toxic residues
-
Abrasive scrub pads that scratch sealing surfaces
-
Submerging any part of the machine in water
Beyond Cleaning: Critical Maintenance Checks
Cleaning alone won’t keep your chamber vacuum sealer running optimally. Regular inspections of wearable parts are equally important.
Gaskets should be inspected weekly for cracks, compression, or stretching. If the gasket no longer “springs back” when pressed, it’s time to replace it. Gaskets typically last 1–3 years depending on usage.
Teflon tape on the sealing bar should be replaced when it appears burned, darkened, wrinkled, or torn. Signs of wear include bubbling or uneven seals.
Vacuum pump oil requires regular attention. Check the oil level weekly through the inspection window. Replace the oil when it turns dark or contaminated—typically every 500 operating hours or every 1–2 months under continuous operation.
By following these maintenance practices, you can prevent problems such as reduced vacuum strength or pump failure before they occur. For visual guidance, KUNBA provides maintenance video resources covering vacuum pump cleaning, oil changes, and heating wire replacement.
Real-World Scenarios: How Usage Determines Frequency
Commercial kitchen sealing raw meat daily
A restaurant portioning beef, chicken, or fish every day faces the highest contamination risk. Protein juices and fat residue build up fast around the seal zone and chamber. For this scenario:
-
Daily: Full cleaning routine after each shift, including chamber wipe-down, sealing bar cleaning, and gasket inspection
-
Weekly: Oil level check and pump intake filter cleaning
-
Monthly: Vacuum depth test and seal strength verification
Small bakery sealing dry ingredients weekly
A bakery using a chamber sealer for flour, grains, or nuts faces minimal moisture and contamination risk. For this scenario:
-
After each use: Wipe chamber and sealing bar to remove dust and particles
-
Monthly: Deep cleaning of all components
-
Quarterly: Full inspection of gaskets, Teflon tape, and seals
Food processing facility sealing high-moisture products
Facilities handling soups, marinades, or ready-to-eat meals fall between the two extremes. For this scenario, manufacturers often recommend cleaning at least every 4 hours of operation. This aligns with food safety requirements for equipment that makes direct contact with food products.
For more guidance on matching equipment to your specific application, explore KUNBA’s solution resources for different industry needs.
Building Your Maintenance Routine
Creating a sustainable cleaning routine doesn’t have to be complicated. Here’s a simple framework:
-
Post-use ritual: Make cleaning immediately after use a non-negotiable habit. The CASO VacuChef 70 manual notes that leaving the unit uncleaned for long periods makes residue removal progressively more difficult and may eventually damage the unit.
-
Weekly check-in: Set a recurring calendar reminder for weekly inspections—gasket condition, oil level, and general cleanliness.
-
Monthly audit: Dedicate 10–15 minutes monthly to test vacuum performance and inspect all wearable parts.
-
Document everything: Keep a simple log of maintenance activities. Recording vacuum depth measurements (in mbar or hPa) and cycle times each month helps spot gradual performance declines before they become failures.
KUNBA’s maintenance resource center provides additional support, including video tutorials and troubleshooting guides to help you establish and maintain an effective routine.
Next Steps: From Maintenance Knowledge to Equipment Selection
Understanding how to maintain a chamber vacuum sealer is essential—but it’s equally important to choose equipment that makes maintenance easy. Features like removable gaskets, accessible drain ports, and straightforward oil change procedures can significantly reduce the time and effort required for routine care.
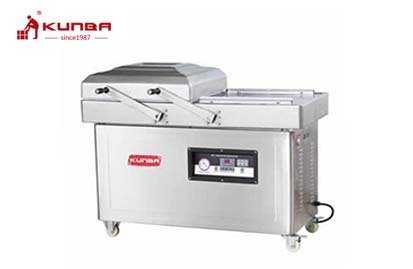
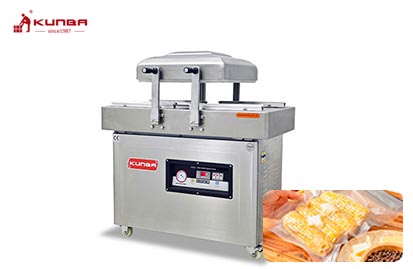
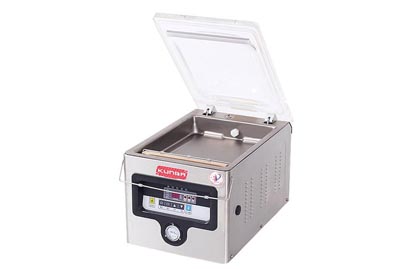
Once you’ve clarified your usage volume, product types, and maintenance capacity, comparing the specific specifications of available options becomes the next logical step. You can review KUNBA’s single-chamber and double-chamber vacuum sealers for different production scales, or explore the comprehensive product lineup to find a model that matches your operational needs.
For ongoing education, consider reading KUNBA’s guide on how to set up a double chamber vacuum packing machine, which includes detailed daily maintenance routines, or explore the ROI analysis of upgrading to a dual-chamber system for growing operations.
Related Reading
-
How to Set Up a Double Chamber Vacuum Packing Machine
-
DZ-260 vs DZ-300 Single Chamber Vacuum Sealer – Differences
-
ROI Analysis: Upgrading to a Dual Chamber Vacuum Sealer
-
How to Clean and Maintain Your Vacuum Packing Machine
-
Vacuum Packing Machine Selection with Full Support
This article is part of KUNBA’s technical content library. No direct sales or pricing information is included. All technical discussions aim to help you make informed purchasing decisions.